I had used the plus and minus symbols on the keyboard, to
thicken the sound and visuals bar; using this, I was able to easily change the
volume and be able to have a smoother and less jarring ascending and descending
and introduction to new diegetic and non-diegetic sounds. I used the arrow keys
up and down to change between the next/ previous clips, being able to keep
track of the pacing and the next cuts, and in case something needed changes to
it. I used left and right of the arrow keys to specifically pin to each frame,
I did this so that I could accurately understand when to use sounds for
specific moments in the project also a way to cut a clip before a new angle is
introduced or delete a cigarette burn that informs a new shot. I used the M key
a few times to add markers to specific points, coming back to them in later
times and know specifically where the points should be used. The C key was a
way for me to easily change to cutting up clips, not having to search for the
razor tool, streamlining the process of cutting and editing parts; I changed
between the hand and razor tool the most, the hand tool being H, this way I could
drop clips into specific points in the timeline without editing the clips
themselves. I used the square brackets to easily increase or decrease volumes
to specific sounds, having the desired effect from each sound due to what
should be the loudest at each point. I used the comma key to insert clips into
the timeline. The space bar was a way to easily and quickly stop and start the
timeline. Throughout the process, the workload would be too large for Premiere
to properly play the project, because of this, it meant that I would have to
render at points, having a smoother replay, I used the enter/ return key to
render throughout the project, an efficient way to have an easier understanding
of what the clips would actually look like. I had used the backslash key to
quickly look at the overall timeline and using the mouse the quickly jump from
one clip to another when editing or dragging in new clips to fit the previous
shot. Using the copy and paste [CTRL C and CTRL V] would create an identical
version of the clip that I would already have, I could test the image such as
lowering it’s opacity without having to step backwards [CTRL Z] instead just
deleting the clip by highlighting the clip with the D key, highlighting the
clip that the playhead would be on.
Thursday, 4 April 2019
Assingment 2 Task 1 Car Chase proof
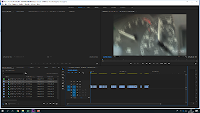
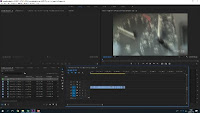
I edited the clips mainly according to the editing decision list, earlier made. I deleted all the irrelevant and unusable footage scattered throughout each recording, having around 5 minutes of usable footage; after which, I grouped them together within a beginning, middle and ending structure, knowing all the clips that I would use and build sounds according to what would be shown on screen.
The loud car
rev was obvious at the beginning, then as soon as I was introducing other
sounds at the beginning, I lowered the volume scale after the beginning few
seconds of the engine starting.
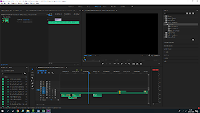 Due to no footage of the backstory of the car chase, I
had assembled different sound effects for there to be a reason. I brought in a
person running from the left side to the right, connoting to that being the
person that would be driving the vehicle, I used alarm bells and gunshots;
however, due to this taking place outside and the rest of the footage built
around this red car, I had the sounds be taken place from the perspective of
inside the car, I used a lowpass on all of the sounds and as the car door
opens, I set all the sounds such as the ambiance and alarm bells to normal
effect and as it closes again, it would be set back to its original state of
lowpass.
 At the beginning of the chase after
the crime, I had faint police sirens come from the one side of the speakers/
headphones, giving a sense of the further surroundings after establishing the
local area and actions. As the camera cuts to the car speeding through the
road, I have the car come from both sides, this way it feels like that both
cars are now on the same road and that the police car has been able to gain
shorter ground between the car we see, adding tension to the scene.
 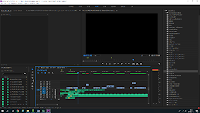 I added diegetic music to fill empty space between
there being not many sound effects occurring, this adds depth to the amount of
sounds used for each moment throughout the scene whilst having the wanted mood.
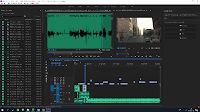 The car radio was changed from the previously mentioned diegetic music into
car radio static, this reveals that the music that was heard was happening in
the world and that the character has manipulation around their surroundings,
the radio is more powerful on the right side, however not being so noticeable
that it distracts the viewer from it only happening from one side, it was on
the right side due to the radio placed on the characters ride side of them
driving on the left area of the car, where most of the static heard from the
character would be coming from. I had also done this
slightly to the second song ‘sinnerman’, this again would add to the realism of
the scene whilst not being distracting to the viewer.
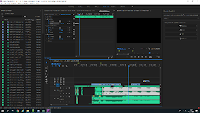 I
had gradually lower the volume of the police sirens as the car was distancing
from the police, this would add realism and awareness to the situation. I also
had added low pass to the siren whenever the shot would be from inside the car,
whenever a shot from outside of the car was shown, I would heighten the volume
of the siren, lower the volume of the music slightly and remove the lowpass to
the siren.
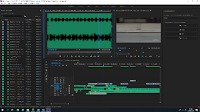 As the police car is shown
on screen for one shot, I would have a quieter version of the siren and pick up
volume whenever it would get close to the camera, I also had engine and tire sounds come from slightly to the left and as the car drove away from the camera,
on the opposite end, it would come from the right, keeping a clear rule and
continuity throughout the shot.
The
car, coming from the right side of the screen starts more powerful on the right
side and progresses through to leveling out between both sides, left and right.
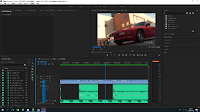 The interior of the car contrasts with the exterior shots and surroundings. The engine between outside
and inside shots are different and the outside engine becomes more clear and
the inside having a more vibration like sound quality to it, however, the sound
that stays the same throughout each types of these shots is the music, being
able to be contained in the same way throughout this scene and not to irritate
or distract the viewer from the music playing, or else the changes throughout each point would become too noticeable to someone.
 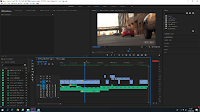 During the shot that a grey
car and it’s tire can be seen, I had that be the dominant motor, having a
larger truck like sound effect around the right side of the speakers, reinforcing the visuals, and as the red car starts to center the screen, so
does the audio.
As
the character puts their foot down further on the pedal, I have increased the
volume of the internal engine, raising intensity and keeping continuity,
matching the visuals.
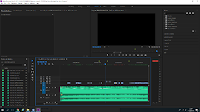 Introducing the helicopter, I had the propeller noise coming from the
left, further understanding the surroundings and then slowly coming neutral, at
this point we can realize it’s chasing the protagonist and that it has probably
found them. To raise the power of the helicopter and the magnitude of the
problem, I decided to not use any additional deigetic sounds meaning they're no
distractions. I also cut apart clips to imitate the helicopter and choppy
decision making. The only sounds besides the helicopter was a piece of music
that panned from left to right.
I also varied the volume of
the helicopter by pinning points of the helicopters timeline and lowering them
gradually, for people not to pick up on what is happening, however might being
able to understand distance is closing and opening between the car and chopper.
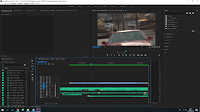 I cut apart some of the
music to keep the theme of the helicopter, in different places keeping the
sporadic attitude to the closing section. I added sounds back into the scene, symbolizing the act of coming back to reality, the car engine driving toward
and away from the camera was from central to left, the way the visuals had shown
it.
Subscribe to:
Comments (Atom)


